Note on extracting OBB files in Android
This is just a collection of notes on how to extract opaque binary blobs (OBB) from Android apps using the emulator. Useful when you have apps that download somewhat static content that one would like to extract, e.g. dictionary apps such as SAOL.
In rough terms:
- set up an emulator
- install the app
- decrypt and mount the image
- access the file(s)
Setting up an emulator
The easiest, but heaviest in terms of storage, is to install Android Studio.
As usual, on NixOS (or using nix elsewhere) this is just
$ NIXPKGS_ALLOW_UNFREE=1 nix run --impure nixpkgs#android-studioThis should come with an Android Virtual Device (AVD) already set up and ready to use.
(Note: running the emulator on Wayland required QT_QPA_PLATFORM=xcb
as documented on the excellent archlinux
Wiki)
Installing the app
Well, you’re on your own here. One option is to sign in to Play Store
and downloading it. Another is to download an (X)APK from third-party
sites and installing it through adb. Pick whatever works.
Some apps download data on launch, so make sure you run the app and let it fetch whatever you need.
Terminate the emulator afterwards.
Decrypting the AVD image
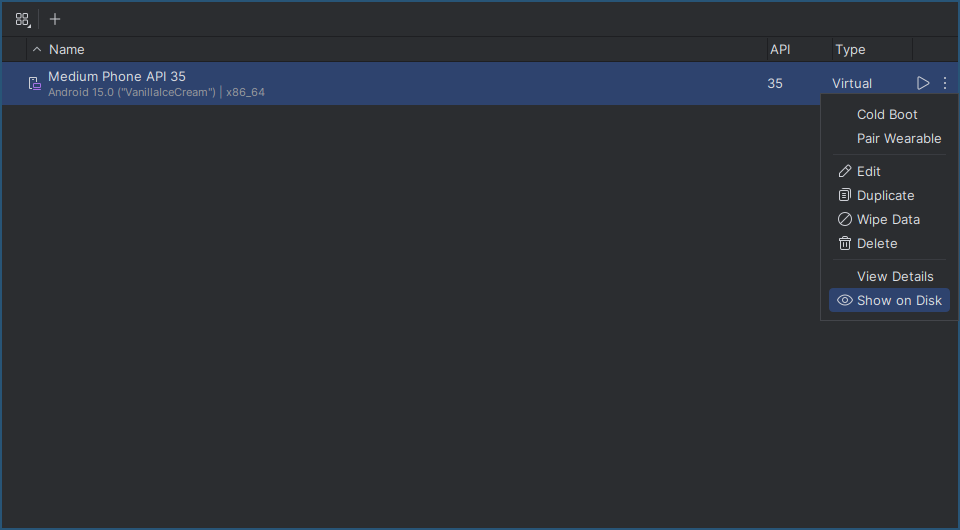
First, locate where the AVD is stored. This can be done in the Device Manager in Android Studio with the “Show on Disk” option.

It should be in ~/.android/avd/.
$ ls ~/.android/avd
Medium_Phone_API_35.avd  Medium_Phone_API_35.ini
The AVD contains the encrypted userdata-qemu.img.qcow2 file for
which we’ll use
SlugFiller/fbe-decrypt to
decrypt.
The instructions in the README are pretty clear. In short, this is enough (again using Nix):
$ (cd /tmp && git clone git@github.com:SlugFiller/fbe-decrypt.git)
$ # From the AVD directory, e.g. ~/.android/avd/Medium_Phone_API_35.avd
$ nix run nixpkgs#nodejs -- /tmp/fbe-decrypt/fbe-decrypt.mjs
Decrypting 393216 of 393216 inodes
Changed 1027833 blocks and 37542 buffers
Written 1572864n of 1572864n blocks
The extracted image is userdata-decrypted.img.
Mounting and extracting
Now, mount it somewhere reasonable, like /mnt/device or /run/mount/device.
$ sudo losetup --find --show userdata-decrypted.img
/dev/loop0
$ sudo mkdir /run/mount/device
$ sudo mount -t ext4 /dev/loop0 /run/mount/device
$ ls /run/mount/device
adb            app-staging   gsi_persistent_data  nfc               rollback-observer          user
anr            backup        incremental          ota               server_configurable_flags  user_de
apex           bootchart     local                ota_package       ss                         vendor
app            cache         lost+found           per_boot          storage_area               vendor_ce
app-asec       dalvik-cache  media                preloads          system                     vendor_de
app-ephemeral  data          mediadrm             property          system_ce
app-lib        drm           misc                 resource-cache    system_de
app-metadata   fonts         misc_ce              rollback          tombstones
app-private    gsi           misc_de              rollback-history  unencrypted
Perfect! All good! Let’s find all .obb files.
$ sudo find /run/mount/device -name '*.obb' 2>/dev/null
/run/mount/device/data/se.svenskaakademien.saol/files/assetpacks/database/64/64/assets/main.28.se.svenskaakademien.saol.obb
Note: sudo because permissions are very restricted, 2>/dev/null to
remove a bunch of Structure needs cleaning errors.
When done, unmount as usual:
$ sudo umount /run/mount/device
$ sudo losetup -d /dev/loop0
It might also be useful to delete the image, since it’s quite large.
$ ls -lh userdata-decrypted.img
-rw-r--r-- 1 rasmus users 6.0G 15 jan 11.24 userdata-decrypted.img